
·
This tutorial is for those people who don’t want
to use external LED/LCD screen for raspberry PI project development.
·
You need following Component.
a). Raspberry Pi device
b). Laptop
c). Router
d). LAN Cable or USB Wi Fi connector.
e). 5 V power supply
d). SD card (mini.
8 GB)
·
You need following software.
a). Advance
IP scanner. (http://www.advanced-ip-scanner.com/index1.php)
b). Putty
software (http://the.earth.li/~sgtatham/putty/latest/x86/putty.exe)
c). Xming (http://sourceforge.net/projects/xming/)
d). SD formatter (https://www.sdcard.org/downloads/formatter_4/eula_windows/index.html)
e). Win32
Disk Imager (http://sourceforge.net/projects/win32diskimager/)
For start raspberry pi with laptop
screen follow below steps
1.
First we have to install the Operating System
for the raspberry Pi so download the OS from the given link (https://www.raspberrypi.org/downloads/)
Here I use (RASPBIAN JESSIE) OS, after
download completed we have to install it on SD card so before installing OS we
format the SD card with SD formatter , so start the “SD formatter” software as
shown bellow

2.
Select your SD card and click on “Format” button.
After successfully format the card now we have to install the operating system on the SD card.
3.
Start the “Win32 Disk Imager” software. Now
browse the operating system Image file witch you download and select the SD
card in give dropdown list and click on “Write” button.

This will start
the writing the image file to the SD card. This will take couple of minutes so
please wait for some time. After successful write the SD card, attach you SD
card to the Raspberry PI and follow bellow steps.
4.
Connect the LAN cable one end to router and
other ends to raspberry Pi device also connect the Laptop to same router. As
shown in figure.

5.
Now give power supply to raspberry pi. As shown in
figure

6.
Now start Advance IP scanner and start the scan
with your IP address series.

7.
Here we
connect the raspberry pi to the router because router will assign automatic IP
address to all the connected device. So we get the IP address of the raspberry
pi from the router. Here I have IP address (192.168.0.113)

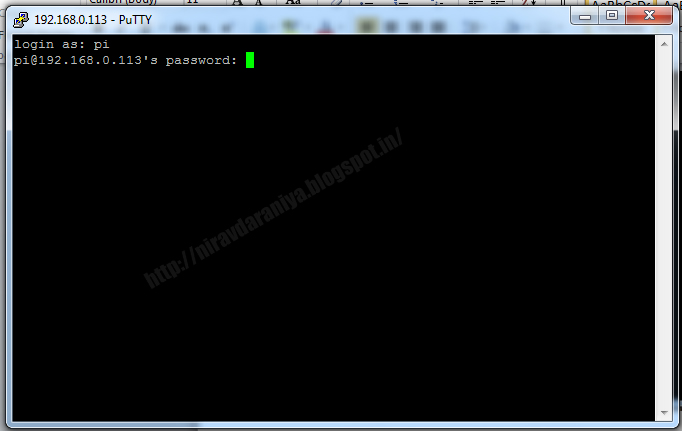
8.
Now start
the Putty software and enter the Host
Name (IP address) as per bellow image

9.
Now go to following location and make them mark
a.
Connection
>> SH >>
X11
Make mark to “Enable X11 forwarding”
as per bellow image.

10.
Now click on “Open” button this will open of
Windows (something like CMD)

11.
If your PI is successfully started and if your
IP address is valid the it will ask for the Username and password as showing
image
User Name: pi
Password:
raspberry
12.
IF you enter valid username and password then it
shows bellow screen.

13.
Now starts the “Xming” software, it shows in task
bar as shown in image.

14.
Now type “lxsession” command in putty windows and hit enter.
Now wait for few second it will open raspberry pi windows on your desk tops.


15.
Now you can start you work with raspberry Pi. As
shown in bellow.

Now you enjoy with your raspberry PI, if you like my
tutorial then comment on this. And if you have any query the write it to
comment box or mail me on n005nirav@gmail.com
- What is Class and Object in C#.net ?
- What is Encapsulation in C#.Net ?
- What is Abstract Class in C#.Net,How to use Abstract class in .net?
- Wht is Inheritance in c#.net ?
- What is Method Overloading in .Net?
0 comments:
Post a Comment
Thanks for comment